Wednesday, April 1, 2015

SPRING DECOR 2015

Hi everyone!  It's great to back after a few months break away from blogging.  As I told you in a previous post, I started a new job and it has taken up quite a bit of my time.  Now that I'm finished with orientation, I'm hoping to have more time for posts.

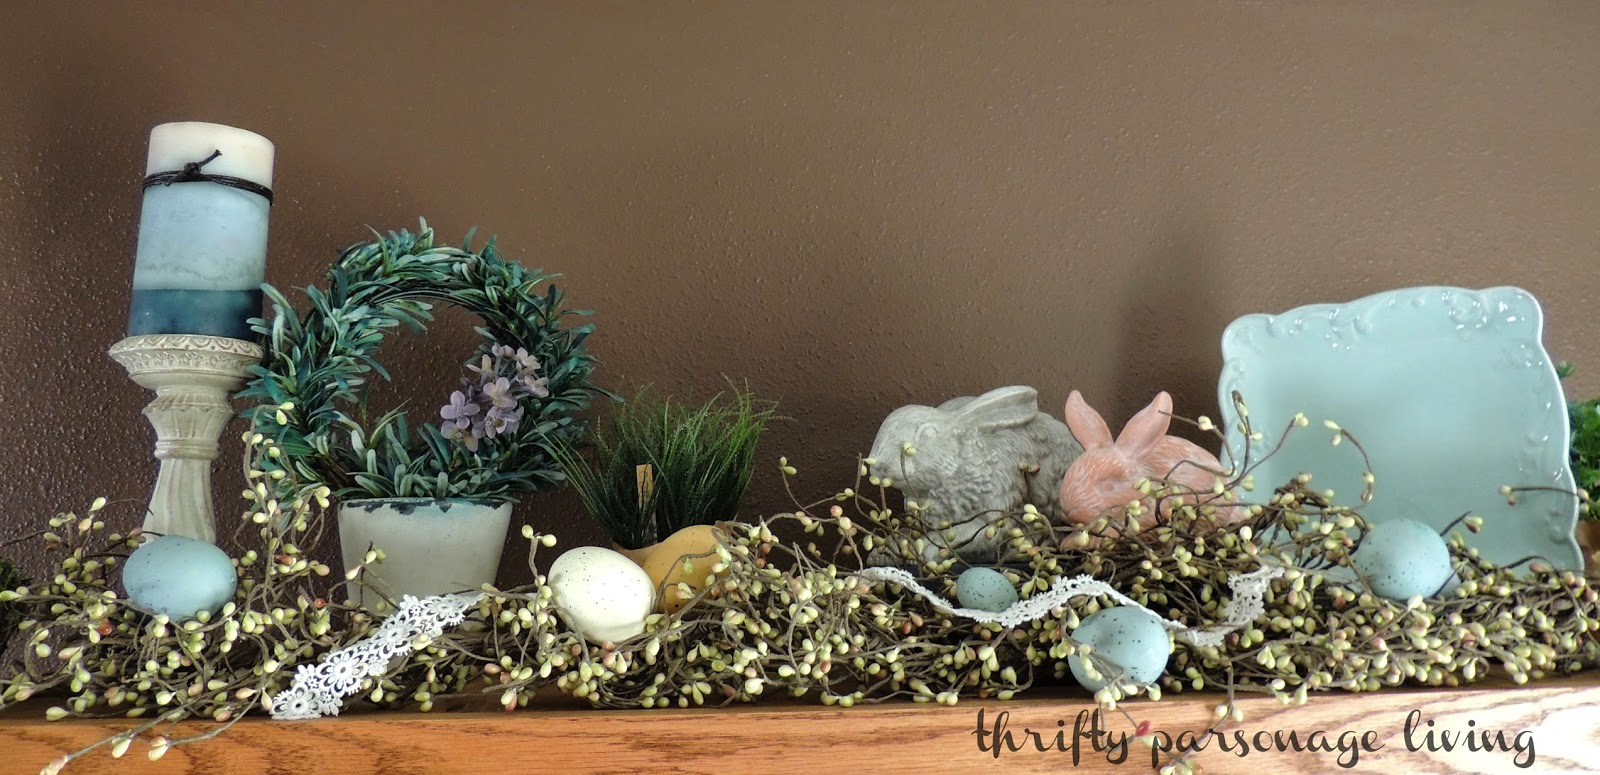
I love spring and the Easter Holiday.  Today I thought I would show you how I decorated our dining room for spring.


I'll begin by showing you what I placed on the top of our Hoosier cabinet.  I used things that I've had in the house from the past few years.  By using these items over you save a lot of money, and arranging it different from year to year gives the items a new look.

Friday, January 30, 2015

DIY TUFTED HEADBOARD

Hi everyone!  Today I am going to be sharing my - DIY Tufted head board.  I must say, I'm happy to be back after over a month of no blog posts.  It's been a little busy around our home.  My husband and I both got sick at Christmas.  I missed all the Christmas parties; and it took me a good three weeks to get back to normal health.  Two weeks ago, I started a new job; and I've been in the process of working more hours with orientation.

For those of you who have reading my blog for some time, you may recall our son and daughter-in-law got married a year and half ago. I shared the DIY wedding rehearsal dinner that we did for their wedding.   As a wedding gift for our children, my husband has made a piece of furniture.  The couple gets to select what they would like.  They usually find a photo of the piece of furniture they like; and my husband builds it for them.  While preparing for the rehearsal dinner, my sister and brother-in-law were talking to my husband asking if he would be interested in a walnut tree that went down in their grove.  Of course, we jumped on that offer.  There was, however, quite a delay when the tree went to the mill. While at the mill, the owner had a fire and had to rebuild his kiln....thus we had to wait for the wood to get milled for almost a year.

Once we had the wood, my husband went to work preparing the wood. He then built the wood part of the bed.  Once he had that completed, we invited our son and daughter-in-law to help us assemble the tufted part of the bed.


We made the tufted headboard using the same technique we used when we made our tufted headboard back in 2010.

Wednesday, December 24, 2014

VINTAGE SLED DECORATED FOR CHRISTMAS

While getting ready for an outdoor 40th wedding anniversary party this summer, my sister ran across an old vintage sled.  It had been sitting outside in the elements behind the garden shed for years.  When her and her daughters found it, they all wanted it to decorate for Christmas.  My sister was not about to give this treasure away, at least not yet.

Fast forward to December ~ I received a phone call from my sister asking for my help in decorating her sled.  Of course, I said YES!  A chance to work on a fun diy project, while spending time with my sister.  

I also had visions for a sled decorated for Christmas.  It was one from my childhood, and the one our children used for many years.  I had it all ready to load onto our moving truck back with our move in 2012.  It was while standing there that our daughter (a children's photographer) spotted it.  I agreed that she could keep it in Washington to use as a photography prop.  My husband said we could enjoy it in her photos; and we've been doing just that.

Here it is with our sweat grand daughter sitting on it for a Christmas card photo shoot.


I know you're wondering about the sled we made over, but I couldn't resist sharing the photo with you.

Here it is ~

Tuesday, December 23, 2014

CHRISTMAS HOME TOUR 2014

Hi everyone!  Christmas is fast approaching; and I realized that if I didn't post my Christmas Home Tour soon, Christmas would be here before you saw it.  So without any more delay -  my 2014 Christmas Home Tour.  Some of the items may look familiar to you as many of the things I used this year are the same as last year.


Come on in!  We'll start in the living room.

Thursday, December 18, 2014

BALLARD DESIGNS TINSEL BRANCH KNOCKOFF

Christmas is fast approaching and with that comes decorating your home for the holiday.  I will be sharing my Christmas home tour with you very soon, but today I wanted to share with you a little project I just finished for the kitchen.  It's a Ballard Designs tinsel branch knockoff.

 Making my home sparkle at Christmas is always fun using glittery ornaments and tinsel. I also love adding natural items here and there.  When I saw the beautiful glittery tinsel branches that Susanne Kasler created at Ballard Designs, I knew I wanted to make one of these pretty branches for my home.  You can purchase the champagne colored branches at Ballard Designs for $19,  but I knew I could make my own for less.


While shopping at Mernard's with my husband recently, I found the tinsel that would work for this project for a mere $1.29.

Friday, December 12, 2014

POTTERY BARN JINGLE PILLOW KNOCK OFF

I started a few projects back in November and I'm happy to say I can finally show you one of them completed.  The project completed is my Jingle Lumbar Pillow.  I  loved this pillow when I first saw it some time ago in the Pottery Barn catalog, however this pillow comes with a price tag of $39.50.  That price is just a bit much for me, and I knew I could make one for a lot less.

Here's my version....


You can view the inspiration for this Pottery Barn pillow here.

Monday, December 8, 2014

DIY SNOWBALL VIGNETTE

I started working on a new diy project for our Christmas decor back in November. It was interrupted when we had a family member in the hospital for a week.  We then went right into thanksgiving, so it's taken a little bit to get back to the project.

I'm amazed how a quick, off the cuff, spur of the moment project can be the number one hit item on this blog.  Can you guess what it is?  It's my DIY Epsom Salt Candle and Ornaments.   It receives more page views than any other diy project I've shared with you.  It's been featured at Redbook, Epsom Salt Council, along with a few other blogs.

Using the same technique I used when making my Epsom Salt Ornaments/Snow Balls, I created another SNOWBALL project.  Today, I finally get to show it to you .


I basically did the same technique for these snowballs as the ones I made previously.

Wednesday, November 12, 2014

ADDING SOFT AND COZY WINTER ITEMS

The cold winter weather has hit us the past few days. Our temperatures have dipped into the teens and we woke up to snow falling this morning.  I decided it was time to add some soft and cozy winter items to the living room.  I'm not moving out my fall decor just yet, but just adding a few winter touches.


I love the chunky cable knit pillows that Pottery Barn has.  The drawback to the Pottery Barn pillows is the price tag they come with  - $59.50, on sale for $45.   As you may know, a few DIY's have come up with their own version of these pillows using recycled sweaters. You can find many of the tutorials on Pinterest. Since I had an old sweater that would work perfect for this project, I decided to plunge in and make my own too.


Thursday, November 6, 2014

GIVE THANKS PILLOW ~ DIY

Fall is a wonderful time of the year and with the weather cooling it is a great time to work on a few projects indoors. I recently worked on a fall diy pillow. I showed it to you in my fall home tour .

 I love the Pottery Barn gather pillow, so decided to make my own pillow and change it just a bit using the words give thanks.  Today I'll  show you how I made it and then you can make one for yourself if you'd like.


The first thing you will need is fabric.  I used left over drop cloth fabric for this project, but duck canvas or cotton fabric would work also.

Wednesday, October 22, 2014

FALL HOME TOUR {PART TWO}

It's been a few days since I shared the first part of my Fall Home Tour.  I've been busy with many projects at the Parsonage.  I didn't want to make you wait any longer for the rest of the tour, so without any more delay...come on into my living room. It's all dressed for the fall season.

As you come into the room, one of the first things you will see is grandma's cedar chest. I decided to place a vignette on top of the chest using various pieces of mercury glass. In the vase I added fall leaves along with a few branches.  I love white pumpkins and decided to add them to the vignette for an additional touch of color, rather than the typical orange pumpkins.


On the side tables next to the sofa

Thursday, October 9, 2014

MY FALL HOUSE TOUR

I questioned if I should share my fall home tour, since a lot of things are the same as last year. I however have added a few new things and changed things around a bit so decided to share it with you.
 
Let's start in the dining room.


Tuesday, October 7, 2014

DIY FALL ARTWORK - PAINTED PUMPKIN

We had a very hard freeze here this past Friday night, now that brisk feeling is in the air each day.  I'd say it is safe to say that fall has arrived.  With the cool weather here and the gardening finished for the season, I've had a little more free time.  I've put out a few of my fall decorations, but I like to add a few new things each year.

I really like the white pumpkins along with the blueish gray "Blue Moon" pumpkins.   I tried to find some this fall, but found them difficult to find.  I then remembered  a blog post I read last year  "You can paint a pumpkin canvas, art skills not required" by Jennifer Rizzo.   I decided if I painted a pumpkin, I could enjoy it for the fall season.  I've done a few art and painting projects before but I'm not a pro.  I found Jennifer's instructions very helpful.

So here's my Canvas Pumpkin Artwork.


It's not perfect, but as the Nester says, " It doesn't have to be perfect to be beautiful"!

Friday, September 5, 2014

SUMMER FUN

Where has the summer gone? It's hard for me to believe that it's been two months since my last post! I took a bit of a blogging vacation, but I'm very happy to be back refreshed with much to share.   It is amazing what has all happened in two short months.


The first exciting event came on July 7th.  We became the proud grandparents of our first grandson.  We are so blessed to now have four grandchildren; three granddaughters and one grandson.

Friday, July 4, 2014

DECORATING FOR THE 4TH OF JULY

 I enjoy doing a little decorating for the holidays.  Today I thought I'd show you a few things that I've put out for the 4th.

I did a few very simple things this year.  On the coffee table I placed a wire basket with a few decorative balls.  I had the decorative balls for Christmas, but they work great for holidays like Memorial Day and the 4th of July.  Adding the two small flags, add the patriotic theme to the arrangement.  These items were bought a few years ago at garage sales and a thrift store.


Here's what I placed on the self of the Hoosier cabinet in our dining room.


The bathroom shelf also got a few patriotic things added as well.


We'll be enjoying a picnic dinner today and I'll be using the picnic basket I put together a few years ago.  If you missed the post on how I created this basket, along with a  silverware holder. Just click on the tutorials, you'll find it listed under DIY Picnic Basket.


Happy 4th of July


Wednesday, June 18, 2014

DIY WEDDING ~ WEDDING WEDNESDAY

It's been a while since I've posted on Wedding Wednesday.  My husband and I were involved in a wedding last week.  It was a wedding for a couple in our church and the family is good friends of ours. My husband was the pastor who officiated the wedding.  I had fun helping with some of the diy decorations and flowers.  I thought it would be fun to share some photos from the wedding on Wedding Wednesday.

As many of you know weddings can be very costly and everyone has a budget to keep.  Doing things yourself along with the help of family and friends can help defray the cost of hiring someone to do it for you.  I had the privilege of being one of the friends who got to help.

The wedding took place right next door in our church.  One week before the wedding the mother of the bride asked me to help decorate a wagon for the flower girl and ring bearer to ride down the isle in. 

The wagon was John Deere green with wood planked sides. We knew we had to do something to cover it up.  The colors for the wedding were black and ivory with accents of red.  Here's what we came up with.


 How we went about creating this cute little wagon ~
We first wrapped the wagon with a black sheet, and made the lining using a ivory table cloth.  We then ran a ribbon all the way around the top of the wagon, adhering it with pins to stay in place.

We then measured the height of the wagon and doubled that measurement. Using that measurement we cut ivory and black tulle.

Once the tulle was cut we tied it onto the the ribbon on the wagon.  We formed a knot that looked somewhat like a rose bud.  We then secured the knot with a straight pin.

On the back of the wagon I made a "Here Comes the Bride" sign.  My husband cut a piece of mdf board to a pattern I had drawn up for him.  I then glued card stock paper to it, with the words Here Comes the Bride.


The sign was hung from a piece of tulle.  At the top of the tulle a faux set of wedding rings was placed.

We wanted to cover the green tongue of the wagon too, so a black satin ribbon was wrapped the length of the tongue.  A small ivory tulle bow was then placed on the handle.


The next thing I helped with was the flowers.  I helped take off the thorns and protector petals on the roses.  We decided to keep the protector petals and asked the bride if she would like to use them as decorative accents.  She thought that sounded like a good idea, and we were able to save two large bowls full of petals. 

A florist friend put all the arrangements together, but she was leaving on vacation.  So the morning of the wedding, I trimmed the stems of the bouquets and wrapped them with satin ribbon.  The ribbon design I used was a ballet slipper pattern.  It adds a little extra touch to the bouquets, rather than the normal ribbon wrap.


Bouquets all ready for the bride and bridesmaids.


Here are the floral arrangements in the front of the church.


A bouquet of roses was place on a table in the entry way of the church as well.


 The rose petals that we saves I scattered along the isle tulle.


Petals were also placed on the unity candle table and in the tulle that draped down the front of the table.


The happy couple at the unity candle.


Petals were sprinkled on the guest book table too.


As well as on the gift table.


The book shelf behind the gift table needed a little something as well.  I went and shopped my house and found a few things we had used at our daughters weddings.  The bride had a photo of the couple to add to the display.  A few rose petals were placed on top of the tulle, around the LOVE sign.
This was a budget friendly display that added a little extra touch.


There was an ugly cork bulletin board that was just behind the guest book.  I again shopped my house and found a piece of black sheet fabric to cover the board with.  The Mr. and Mrs. and Love were left over from our daughters weddings.  The friend/florist was working on the bouquets at the time we were working on the bulletin board.  She quickly whipped up a pretty bow to hang on the board. It added the finishing touch that the board needed.  Once again a very quick and easy budget friendly display.


In this photo you can see the bulletin board in the background behind the guest book table.


The board was used as a backdrop for photo shoots.


All of this was done with love for this happy couple.


Come back and in my next Wedding Wednesday post I'll be sharing a few more photos from the church and the reception hall.

Wednesday, May 21, 2014

DIY GRADUATION GIFT ~ COLLEGE SURVIVAL KIT

Graduations season is in full swing and along with it comes graduation gifts.  This past week we had five graduations to attend.  I love to give something a little more personal as a gift and a gift  that you make yourself does just that.

Of the five graduations we had to attend, two of them were for girls.  I decided to make something special just for them - A College Survival Kit.


Here's what I did to make the college survival kit .....

Tuesday, April 15, 2014

BRIGHTEN UP YOUR HOME FOR SPRING

Everyone is anxious for spring this year, myself included.  We actually had a few wonderful warm days last week, but a cold front moved in on Sunday and now we are back down in the 20's and 30 degree temperatures ....burr!  Despite the cold weather I've decided to brighten up the house a bit for spring.

I've started in the living room by taking out the flannel, wool and fur items and brought in some spring accents.  A wonderful way to add a touch of spring and freshness to a room can be done by adding soft fabrics and lighter delicate colors.  All of this can be done without spending a lot of money.  You can even rearrange the furniture for a new fresh look.

The first thing I did in the living room was to replace the snowflake/winter pillows with cozy soft spring pillows.


The nest pillow I made a few years ago was placed in the basket of blankets.

Thursday, April 3, 2014

DIY SPRING ARTWORK

Can you believe it?  It's April and we have a major winter storm advisory for our area today and Friday.  They are even saying that we may receive up to an inch of snow a hour.  I'm so ready for spring to come.  With that in mind, I've started to add a few touches of spring in our home.

You may recall my spring artwork that I created a few years ago.  It's one of the most visited items on this blog.  It's seems a little crazy to me, the things that get visited the most often at Thrifty Parsonage Living are often items I've quickly put together on a whim.  The other visited often is my Epsom Salt Ornaments and Candle.


If you would like to see the full instructions on how I made this,

Wednesday, March 26, 2014

HOW TO MAKE LINED CURTAINS {DIY}

I'm finally back after a little bit of recovery time following my oral surgery. In a previous post I share our guest room makeover. I promised to share the  tutorial on how I made the curtains for this room.


Let's start out by talking about the fabric I used for these curtains.  

Monday, March 17, 2014

DINING ROOM TURNED OFFICE BY DUO VENTURES

Hi everyone, you might be wondering why you haven't heard from me for a little while. Well, I had unexpected oral surgery and haven't  been up to much, other than trying to recover.  


I thought I would take this opportunity to have a guest post from Mel and Nader at Duo Ventures.  If you have not read their blog you've been missing out!  I love pretty much every makeover and organizing idea that they have shared on their blog.  They are a young husband/wife team,  who blog about design, DIY projects and organization.  You can head over and read more if you enjoy this post from them at Duo Ventures.

In the post below they'll tell you how they turned their dining room into an office.... enjoy!

 All the  images and content below are courtesy from the Duo Ventures.

Turning a Dining Room into an Office: Part 2


Well, we're happy to say that a lot has changed in our former dining room!  Several months ago, we made the decision to utilize our formal dining room as a home office instead.  We left off in Part 1, where we outlined our general plans & inspiration for our future office.  If you follow us on Instagram you might have gotten a couple of sneak peeks along the way.  There are still a couple of small projects that we need to complete, but for the most part the room is finished!  

LinkWithin

Related Posts with Thumbnails