Showing posts with label Christmas. Show all posts

Wednesday, December 24, 2014

VINTAGE SLED DECORATED FOR CHRISTMAS

While getting ready for an outdoor 40th wedding anniversary party this summer, my sister ran across an old vintage sled.  It had been sitting outside in the elements behind the garden shed for years.  When her and her daughters found it, they all wanted it to decorate for Christmas.  My sister was not about to give this treasure away, at least not yet.

Fast forward to December ~ I received a phone call from my sister asking for my help in decorating her sled.  Of course, I said YES!  A chance to work on a fun diy project, while spending time with my sister.  

I also had visions for a sled decorated for Christmas.  It was one from my childhood, and the one our children used for many years.  I had it all ready to load onto our moving truck back with our move in 2012.  It was while standing there that our daughter (a children's photographer) spotted it.  I agreed that she could keep it in Washington to use as a photography prop.  My husband said we could enjoy it in her photos; and we've been doing just that.

Here it is with our sweat grand daughter sitting on it for a Christmas card photo shoot.


I know you're wondering about the sled we made over, but I couldn't resist sharing the photo with you.

Here it is ~

Tuesday, December 23, 2014

CHRISTMAS HOME TOUR 2014

Hi everyone!  Christmas is fast approaching; and I realized that if I didn't post my Christmas Home Tour soon, Christmas would be here before you saw it.  So without any more delay -  my 2014 Christmas Home Tour.  Some of the items may look familiar to you as many of the things I used this year are the same as last year.


Come on in!  We'll start in the living room.

Friday, December 12, 2014

POTTERY BARN JINGLE PILLOW KNOCK OFF

I started a few projects back in November and I'm happy to say I can finally show you one of them completed.  The project completed is my Jingle Lumbar Pillow.  I  loved this pillow when I first saw it some time ago in the Pottery Barn catalog, however this pillow comes with a price tag of $39.50.  That price is just a bit much for me, and I knew I could make one for a lot less.

Here's my version....


You can view the inspiration for this Pottery Barn pillow here.

Monday, December 8, 2014

DIY SNOWBALL VIGNETTE

I started working on a new diy project for our Christmas decor back in November. It was interrupted when we had a family member in the hospital for a week.  We then went right into thanksgiving, so it's taken a little bit to get back to the project.

I'm amazed how a quick, off the cuff, spur of the moment project can be the number one hit item on this blog.  Can you guess what it is?  It's my DIY Epsom Salt Candle and Ornaments.   It receives more page views than any other diy project I've shared with you.  It's been featured at Redbook, Epsom Salt Council, along with a few other blogs.

Using the same technique I used when making my Epsom Salt Ornaments/Snow Balls, I created another SNOWBALL project.  Today, I finally get to show it to you .


I basically did the same technique for these snowballs as the ones I made previously.

Tuesday, December 31, 2013

2013 REVIEW AT THRIFTY PARSONAGE LIVING

It's hard to believe that 2013 is already coming to a close. With the new year right around the corner, it has us looking back at what the years has held.  Below you will find a collection of events and projects that have happened at Thrifty Parsonage Living.


Thursday, December 26, 2013

HOT COCOA BAR

I had a wonderful and blessed Christmas and I hope you had the same.  It's hard to believe Christmas has already come and gone. Today I thought I'd share my cocoa bar from our Christmas party. We had a large party of twenty five guests for Christmas at our home. I set up a Cocoa bar as part of our beverage serving area. I got very busy with last minute preparations before our guests arrived, so I only got a few photos of the area. They may not be the best photos, but a least you can see what the bar looked like.


You may recognize the snowflake buckets from my Christmas Home Tour.  They are filled with candy canes, peppermint candies and jingle bells.  The counter had snow flakes purchased at the Dollar Store scattered around on top of white quilt batting.

Monday, December 23, 2013

DIY CHRISTMAS CARD DISPLAY

I created a new display for our Christmas cards this year. You may have seen it in my 2013 Christmas Home Tour.  A few years ago, I used a made over shutter to display my cards. It worked out great for that year, but we've been receiving more cards this year and I needed something larger to display our cards on.

Here's what I came up with.


Friday, December 20, 2013

OH HOLY NIGHT CHRISTMAS CANVAS ~ twinkling stars

In my recent Christmas Home Tour, you may have noticed several projects that I created ~ DIY.  One of these projects can be seen as soon as you come in our front door ~ The Oh Holy Night Canvas.


Tuesday, December 17, 2013

2013 CHRISTMAS HOME TOUR


Welcome to our home!  If your are a new visitor here, I'm so happy you stopped by.  If you're a regular visitor here, thanks for coming back for a visit.  Christmas is such a wonderful time of the year; and I love getting our home ready for the festive holiday.  I'll be joining other bloggers seeing their tour of homes.  So today I'll share my home as it's all decorated for the holidays.

Most of my Christmas decor is centered around a Winter Wonderland theme this year.

Thursday, December 12, 2013

DIY FAUX FUR CHRISTMAS PROJECTS ~ {Fur tree, Fur topped stocking, Fur wreath, & Fur pillow}


In my last post, I said that I would show you how I created my faux fur Christmas projects.
It all started when I made my Faux Fur Tree Skirt, and had left over fabric.  I love the fabric, and really didn't want to waste any of it.  It comes with a price tag of $20 a yard, but I got my yard and a quarter @ 65% off on a Veteran's day sale.  I was able to make quite a few projects with the remnants,

Monday, December 9, 2013

FAUX FUR CHRISTMAS DECOR


Oh, the weather outside is frightful, but the fire is so delightful, since we have no place to go, let it snow, let it snow , let it snow!
(written by Sammy Cahn and Jule Styne 1945)


We woke up this morning to four degree temperature and a wind chill of - 27 degrees Fahrenheit.  Now that's cold !!!! for this girl having moved from the Pacific Northwest where temperatures are very mild in the winter.  With that being said, I find it very fitting to continue showing you my winter themed Christmas decorations.  In my last post, I showed you the Fur Tree Skirt I made.  The tree skirt was cut in a circle leaving quit a bit of fabric around the edges.  Faux Fur is perfect for holiday decor; and  I thought there is no since in wasting this lovely fabric.  It's warm and fuzzy resembling snow and adding a festive design perfect for the season.  I decided to make a few additional projects from the fabric.

Here's what I created:

A Faux Fur Pillow


and

Thursday, December 5, 2013

DIY NO SEW FAUX FUR TREE SKIRT


We woke up to snow on the ground this morning.  There's nothing like beautiful snow covered ground to get you in the mood for winter and Christmas decorating.  Since we're in a new parsonage this year and not enough room for our large Christmas tree that we've used other years.  We decided to buy a new smaller tree.  It was while shopping at Wal-Mart that we found the perfect little tree.  It's an artificial  six foot flocked tree with a smaller circumference.   I've been wanting to do a winter theme Christmas in our living room this year, and this tree was just perfect.  The past few years we didn't have a tree skirt and I improvised by using a table runner wrapped around the tree.  I thought a beautiful white fur skirt would look lovely under our new flocked tree.

Tuesday, December 25, 2012

Monday, December 24, 2012

HOLIDAY HOME TOUR

Today will be the last of my Holiday Home Tour for 2012.   I've already shown you the Living Room and Family Room.  The two remaining rooms are the kitchen and dinning room.  These two rooms are open to each other, so I'll combined them together for viewing.  You will see my Winter Wonderland Theme in these rooms as well.

On the side cabinet I placed three small Christmas trees in white bowls, and added two little birds sitting in some faux snow.

Thursday, December 13, 2012

HOLIDAY HOME TOUR

Wow! what a busy weekend we've had. You may have noticed that I was MIA.   My husband and I flew across country for a preaching appointment in another church.  We ended up spending a lot of time in the airport do to flight delays.  I'm glad to be back home and ready to continue the Christmas Home Tour of the Parsonage!

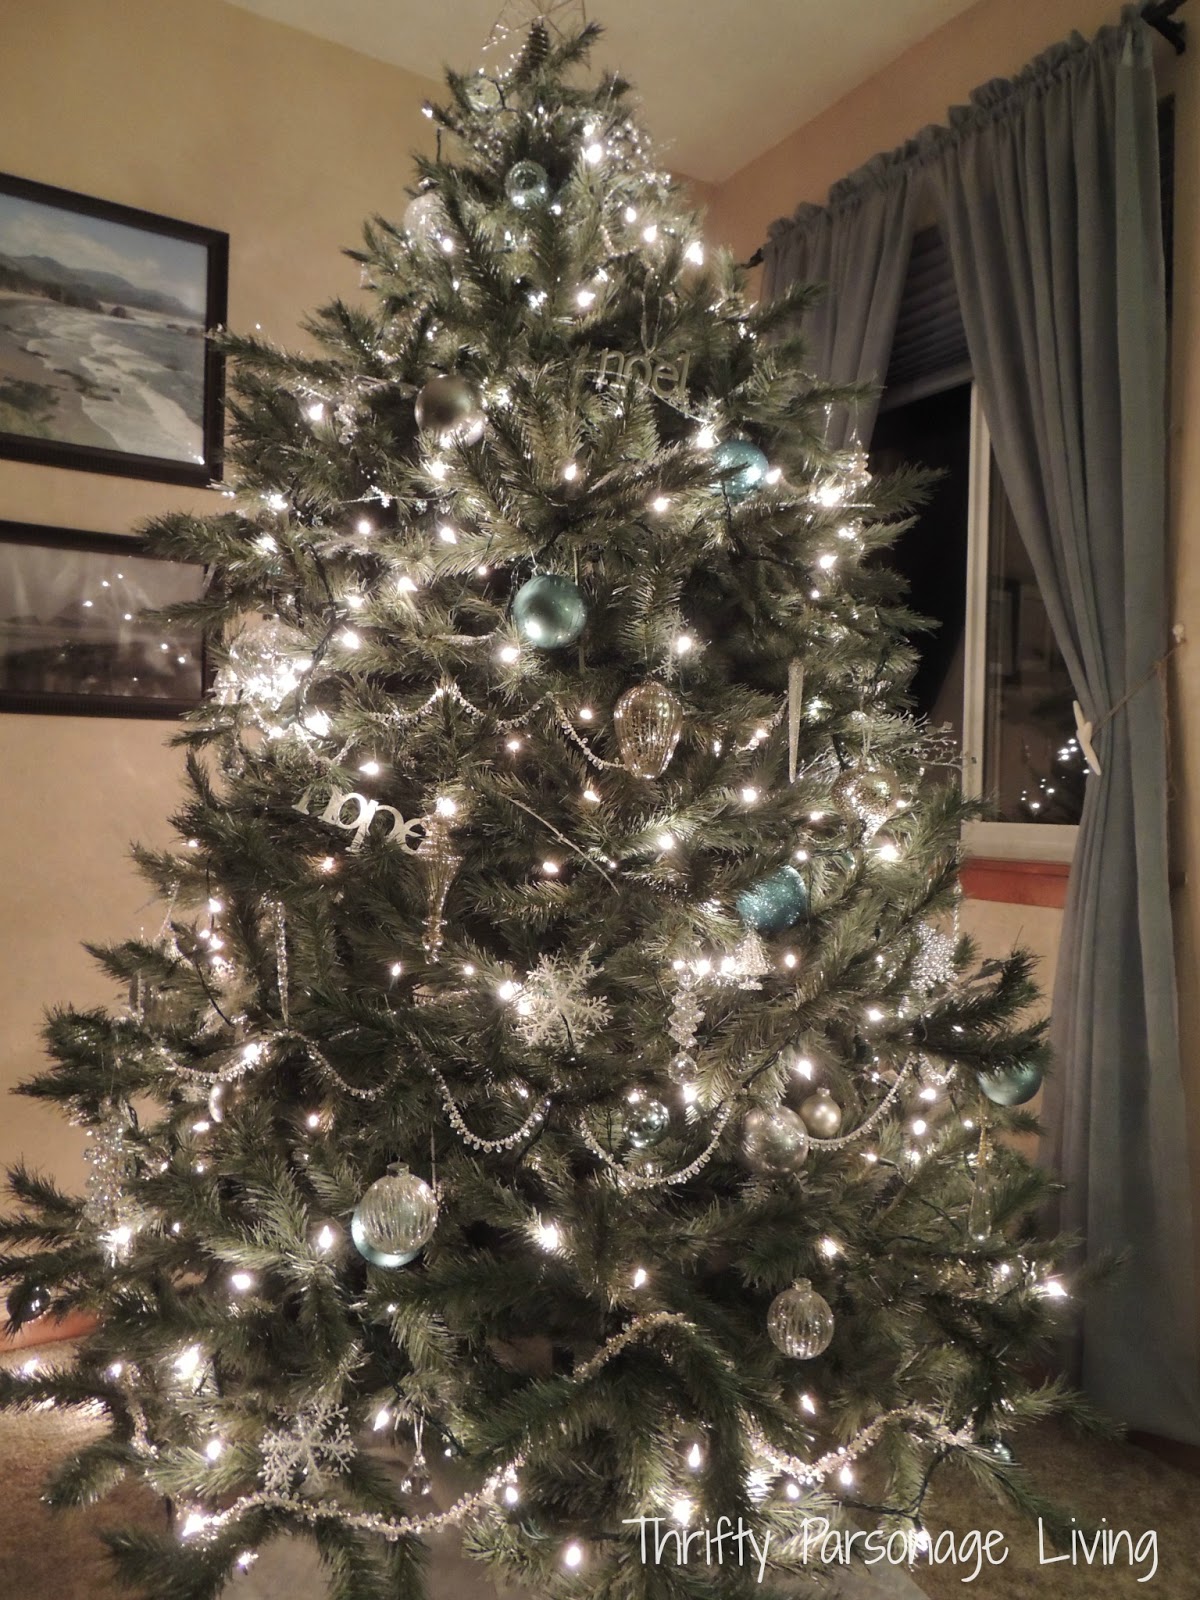
In my last post, I showed you our living room all decorated for Christmas.  Today we'll move on to our family room.   I wanted to continue the same theme/color through out the house this year with a winter wonderland theme. I've incorporated a lot of snowflakes, blue and silver and a little faux snow.

A few years ago we purchased this artificial tree.  The mistake we made was that in the large store the tree looked small, but when we brought it home it was much larger than we thought.  It takes up a lot of space in our small home, so placing it in the corner  take up less space.


I like having the tree in our family room as we sit in this room every day. We can view the tree easily  from the kitchen and dinning room.


The tree is decorated with silver and blue and a lot of glittery items.  I've added a few new ornaments this year that my mom gave me for my birthday.  Here are a few photos close up.


 Thrift store ornaments.


I used what I had for the tree skirt again this year. A table runner left over from our daughters weddings.  I love how the beads reflect the lights of the tree adding sparkle and a little bling.


Next to the television stand, I placed a poinsettia in my grandmothers old red wing crock.


On the top of the desk I placed three buckets I bought from the dollar bin at Target.  I added some jingle bells in the one bucket along with some faux snow.


I'm linking this post to ~
Thrifty Decor Chick - Holiday Home Linky Party - Trees


Friday, December 7, 2012

CHRISTMAS DECOR IN THE LIVING ROOM

If you're like me, once December hits I love to start decorating for Christmas.  I've been adding decor to each of the rooms in our home.  I thought I'd start sharing room by room  ~ Christmas Home Tour.

Today I'll start in the living room since this is where you come into the Parsonage (Our Home).
As you come in the front door you look directly at the wall with the sofa and coffee table.


My decorating is always done on a limited budget so many of the items are from garage sales, thrift stores or hand made myself.  This year I found some sparkly candles and snowflake candle holders along with a snowflake box at the thrift store.  I placed the candles on the table runner I made last year.  On the top of the table runner I added  ribbon and jingle bells.

The only things that aren't second hand items on the table, are the wreath that I bought new last year and the ribbon bought after Christmas last year ~ 75% off.


On the sofa I placed a piece of  faux fur and a pillow.


On the top of the corner cabinet I placed various metallic pieces, along with a few items that add texture and a bit of nature.


  The coat shelf also had a few items added.


I've already showed you my tree vignette that sits on top of my grandmothers cedar chest.


and my candle sticks that I made over sit on a side cabinet.


 Last but not least, the top of the cedar cabinet.


Come back and I'll show you more of my home.


Linking this post ~
Southern Hospitality Holiday Home Linky Party

Wednesday, December 5, 2012

CANDLE STICK MAKEOVER

While shopping at my local thrift store this fall, I came upon a pair of brass candle sticks.  I bought them at the 50% off sale, making the total price for the candle sticks $1.49.


I knew I would give them a makeover eventually. It was while decorating the living room for Christmas that I decided to make them over.

Monday, December 3, 2012

CHRISTMAS TREE VIGNETTE

Hello everyone!  I hope you had a great weekend.  I sure did.  Over the weekend, I was able to add a few  more Christmas decorations, and our home is starting to look pretty.

I've chosen a winter wonder land theme for decorating this year.  Over the past two years, I've been collecting little Christmas trees.  This year I've added a few more home-made trees to my collection.  I thought clustering the trees together in a vignette would be a great way to display the trees.  If we had a fireplace mantle, I would place them on top of the mantle, but since we don't so placing them on top of the cedar chest was the best alternative.


I've been waiting for a sunny day to take photos but I've given up, so please forgive the dark photos.

Monday, November 26, 2012

DIY METALLIC BAY LEAF TREE

I hope you had a great thanksgiving weekend.   I've been greatly blessed once again over this past year. I'm also thankful for the wonderful day we could spend with our children and grandchildren.

It's hard to believe that thanksgiving is past and Christmas is right around the corner.  While browsing through the Pottery Barn catalog recently, I came across their beautiful Metallic Bay Leaf Christmas Trees.  They have these trees available in gold and silver.  I was really drawn to the silver tree since I plan to decorate with a winter wonderland theme this year.  The trees are $89 to $99 dollars each.  All the silver trees were sold out, but since I'm a real DIY gal, I decided to try and make one my self.


Here's what I did to make my own.

LinkWithin

Related Posts with Thumbnails