Showing posts with label The Parsonage. Show all posts

Wednesday, February 5, 2014

GUEST BEDROOM MAKEOVER

Can you believe it's a year ago today, we were on the road moving from Washington to our new home in Minnesota. Time sure flies by quickly.  Looking back over the year, I realized that I have not shown you all of the rooms in the new Parsonage.  Over the next weeks I plan to do just that, along with showing you the projects completed in each room.

Today, I will start with our guest bedroom which is in the basement of our home.


Now this room looked nothing like the photo posted above.  In fact the room looked pretty tough.  All the carpets had been ripped out of the room a few years ago because of water getting into the basement.  At the time of the water issue, they had to rip up all the carpets in the entire basement and lay tile.

Tuesday, December 17, 2013

2013 CHRISTMAS HOME TOUR


Welcome to our home!  If your are a new visitor here, I'm so happy you stopped by.  If you're a regular visitor here, thanks for coming back for a visit.  Christmas is such a wonderful time of the year; and I love getting our home ready for the festive holiday.  I'll be joining other bloggers seeing their tour of homes.  So today I'll share my home as it's all decorated for the holidays.

Most of my Christmas decor is centered around a Winter Wonderland theme this year.

Thursday, August 8, 2013

A BEDROOM TRANSFORMATION

It's great to be back as it's been quite some time since my last post.  I took a little blog vacation and worked on getting some projects finished around the Parsonage.

I'm sure many of you have thought I'd total forgotten to show you transformations that have taken place since February when we moved into the Parsonage.   Today I'd like to share the smallest bedroom in the Parsonage.  When we lived here before, this room was our son's nursery.  It's hard to believe how time flies and he's now in college. 

When we moved here, the room had peeling wallpaper on the lower half of the walls. I'm very thankful for a few ladies from the church who labored away and got it removed from the walls before our arrival.  This is how the room looked the day we moved in...


wall paper paste and old paint on the walls as well as the old window.

Tuesday, June 11, 2013

PAINTING HORIZONTAL STRIPES ON WALLS (DIY)


I love the look of stripes on walls.  Stripes can be horizontal or vertical, wide or narrow, soft and subtle or bright and bold.  Stripes can add something unexpected to an area making a small area appear larger, for example.  Vertical stripes can make a room look taller and horizontal stripes make a room look wider.  Stripes on walls has been around in the decorating world for some time, but it's a first for me.   Today I thought I'd share how I painted horizontal stripes in my back entry hallway.

Wednesday, May 29, 2013

SMALL BUDGET BUT BIG IMPACT {STAIRS MAKEOVER}

I've had so many projects going on in the house since we moved here in February.  I've been working hard at new projects every week, but the problem is that I don't want to share them with you until they're at least somewhat complete. I have been working so hard to meet the dead line I've set for myself.  You see, all our children and grandchildren along with other relatives are coming here in a few short weeks for our son's wedding.  I really want the house to look somewhat finished when they arrive.  Now you can understand why I haven't been posting a lot lately.  However, I have a finished project to share! Yah!!!

I really wanted to make over the stairway to our basement.  All the guest bedrooms are in the basement, so this area will be seen by everyone coming to stay at our home.   When we lived in this house previously, the entire stairway and basement was carpeted, but sometime between then and now the carpet has been removed leaving the stairway to look like this.


Not my favorite choice of style with speckled paint on the stairs (it looked like paint splashed all over the stairs and basement floor).

Monday, May 20, 2013

NEW WINDOWS

Life has been very busy at the Parsonage. Even though you haven't heard from me in a week, I've gotten a lot of things accomplished.  I finished my nursing continue ed course, attended a lot of graduations, done more painting and varnishing.

The best project to have completed is the windows.  Back at the end of February and first of April the construction began on the Parsonage.  The siding and windows were removed and replaced with new.  Since then this is how our windows have looked, no casing or trim.


Every evening we hung table clothes, sheets and drop cloths over the windows for privacy.

Monday, April 22, 2013

LIVING ROOM REVEAL

I know you've waited a long time to see what I've been up to in our new parsonage.  In my last post, I gave you a little peak into the living room when I showed you my diy bookcase makeover.  Today you get to see the whole room.  It's the only room in the whole house that I can say is finally finished. The room had a long list of to do projects, but thanks to the helping hands of church friends the room is finished.  While we were still in Washington I received a call from a member of the church.  She told me they would paint my husband's office and living room for us, and asked what colors we'd like the rooms to be.  She also told me they were installing all new lights in the parsonage (including pot lights in the living room), and updating the electrical outlets.  I remembered from living in the house 16 years ago, that the living room could be very dark because there were no lights in the ceiling.
 
After a lot of labor pealing off a wall paper boarder that had been painted over, the new paint color is on the walls and it looks wonderful!  It is a soft gray, (Portand by Valspar); and the ceiling is a bright white ceiling paint.  I love how it brightens up the room!


We took down the old curtains and put up new blinds. 

Friday, April 19, 2013

DIY BOOKCASE MAKEOVER

I know you haven't heard from me lately, but life in our new parsonage has been very busy.  Not only did we have to unpack all our household items, but we've had so many projects going on.  Almost every room in the house is getting repainted. The living room is finally coming together; and I'll be sharing the room reveal soon!


 Here's a to do list for the room.


Did you happen to notice the bookshelf on the right side of the picture?

Tuesday, March 26, 2013

HOME TOUR [part 3]

Today you'll finally get to see the rest of our home - The Parsonage. I left off last time showing you the bedrooms .   I've found a photo of the 5th bedroom since my last post. I'll begin the tour today with that photo, and move on to the bathrooms and the rest of the basement.

The church is still in the progress of finishing this room.  The room was a larger room with cement block walls and a small closet.  They have moved one wall over and added insulation, dry wall, new closet and new escape window.  The room still needs all the trim work, baseboard and flooring.

Wednesday, March 13, 2013

PARSONAGE HOME TOUR

I know you've all been waiting a long time for a tour of our new home/Parsonage. Today I'll begin a tour of this 1960's ranch 5 bedroom two and half bath home. The photos of the home where taken back in August 2012 when we flew out to meet with the church council and stayed in the Parsonage for a few days.  I have a limited number of photos, because they were taken with my old camera and it was acting up at the time. I'll show you these photos and later show  you what we have done to change the look of the Parsonage.   The tour begins at the front door where you walk into a small entry area and the living room.


When we lived in this home 16 years ago the rooms where all painted white, making this room look very different. 

Thursday, March 7, 2013

THE NEW PARSONAGE

Hi everyone, I know it's been a while since I wrote a post, but it's been extremely busy here.  We've been trying to get settled into our new home, and at the same time busy with projects.  I know you've all been wondering where we live, so without further delay welcome to...

The Parsonage

Here's the outside of our new home.


 It's a ranch home built in 1962.

Friday, February 1, 2013

FAREWELL AND SAYING GOODBYE

Saying goodbye has always been a difficult thing for me to do.  I guess I'm like my Dad in that respect, he and I would always cry when our vacation ended and we'd  leave my Uncle and Aunt in Michigan and have to go back home to Minnesota.  Tears come easily for me, and I know how hard it is to move! I remember our last move all to well.  I have such a mixture of emotions - excitement for the move, making new friends and settling into a new home, but sorrow for what we will leave behind.

 The Parsonage that we called home for sixteen years.

I'll be sad to leave behind  family and also the friends we've made in this home.

Monday, January 14, 2013

AN UPDATE ON THE PROGRESS OF OUR MOVE

 I know I've been MIA this past week, but it's been a bit busy here with packing in full bloom.  You might be wondering about the progress of our move.  I'm starting to feel like I'm drowning in a sea of cardboard boxes.  The parsonage isn't that large and with everything having to be placed in boxes, we are now walking through allies of boxes.


If you've ever done a large move across  the country yourself, you'll know what a HUGE and daunting chore it is.  First it's the going through and sorting of everything.  Then the endless yards of paper and wrapping of each item.  There are the many trips to the grocery stores for FREE moving boxes, and numerous trips to Goodwill to get rid of the stuff you've purged.


I feel like I'm living in limbo, our house doesn't feeling like home anymore.  Once the pictures come off the walls and curtains come down the house starts to have an empty feel to it.


I'm hoping to do a post (if I have time) on tips for moving. I think I've learned a few things along the way that are helpful, since this is our 13th move in 33years of marriage.  I'm also still looking for a few more people willing to do a guest post for me.  The post doesn't have to be a new post, you could share a post you've done on your blog already.  Please send me an email if your interested.

thriftyparsonageliving(at)gmail(dot)com

Thanks!

Joy

Monday, December 24, 2012

HOLIDAY HOME TOUR

Today will be the last of my Holiday Home Tour for 2012.   I've already shown you the Living Room and Family Room.  The two remaining rooms are the kitchen and dinning room.  These two rooms are open to each other, so I'll combined them together for viewing.  You will see my Winter Wonderland Theme in these rooms as well.

On the side cabinet I placed three small Christmas trees in white bowls, and added two little birds sitting in some faux snow.

Thursday, December 13, 2012

HOLIDAY HOME TOUR

Wow! what a busy weekend we've had. You may have noticed that I was MIA.   My husband and I flew across country for a preaching appointment in another church.  We ended up spending a lot of time in the airport do to flight delays.  I'm glad to be back home and ready to continue the Christmas Home Tour of the Parsonage!

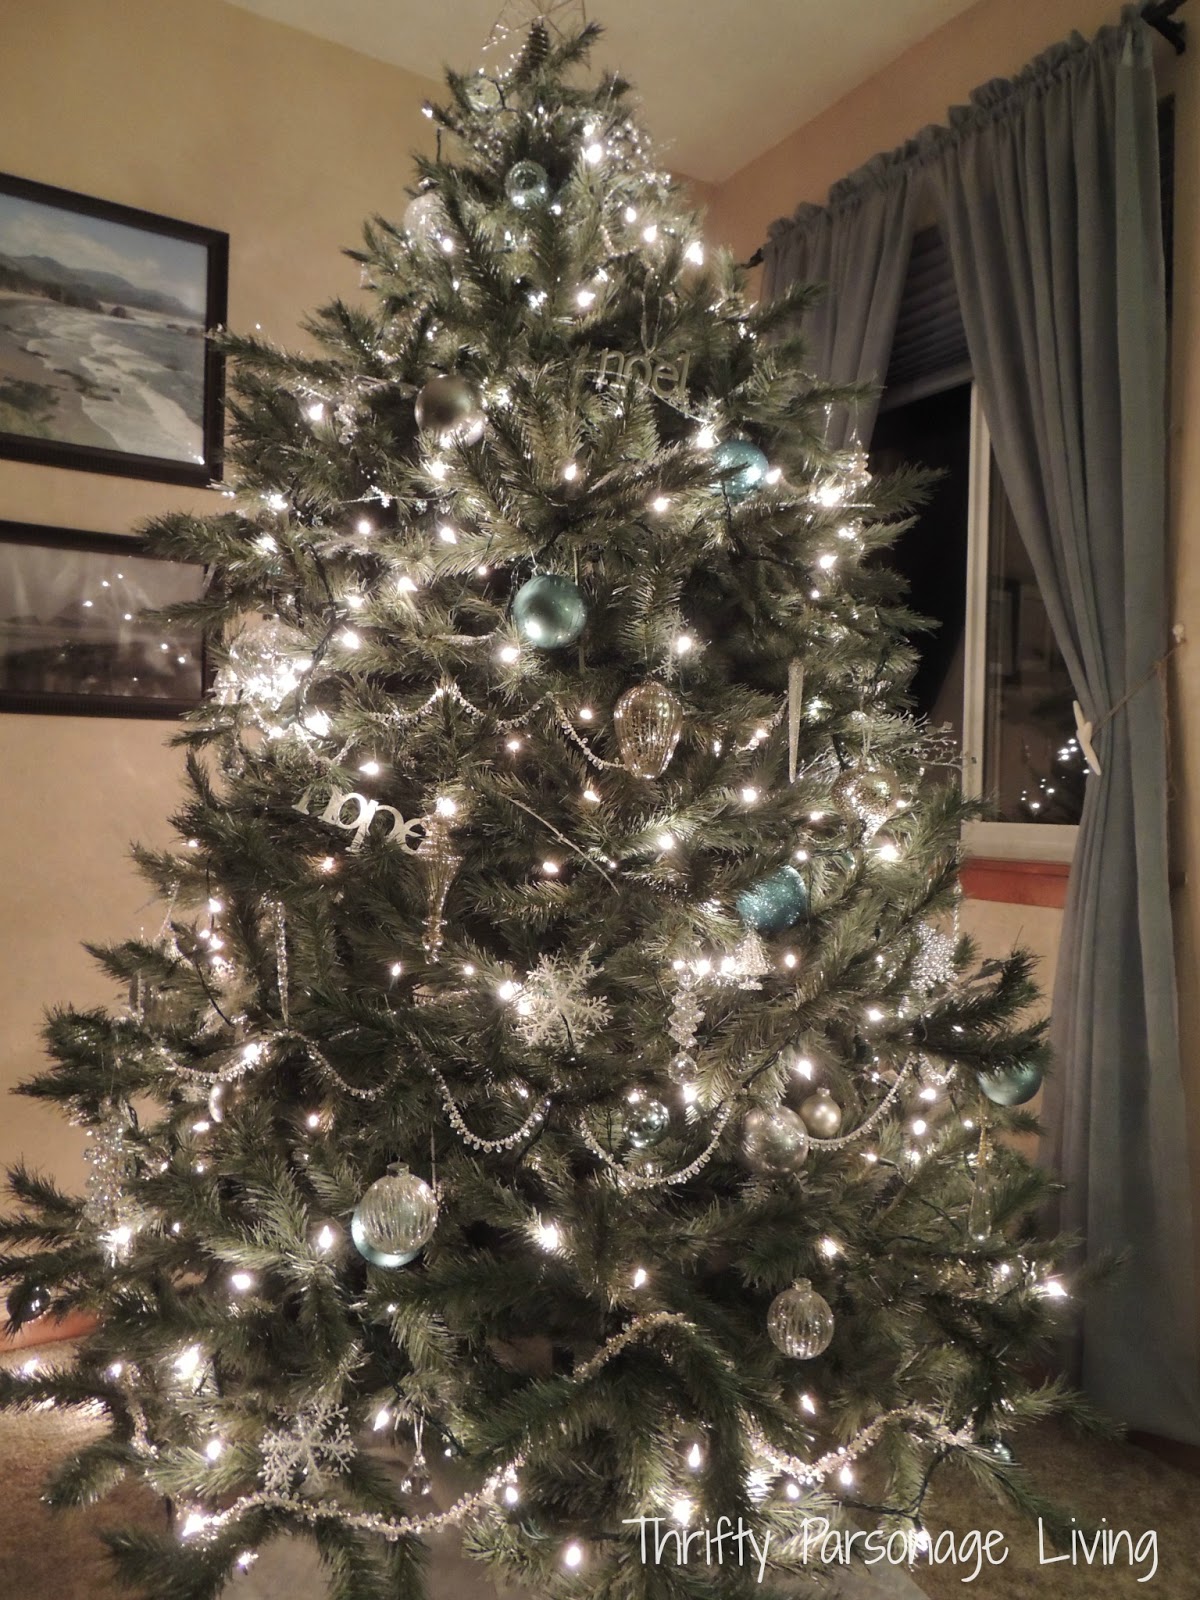
In my last post, I showed you our living room all decorated for Christmas.  Today we'll move on to our family room.   I wanted to continue the same theme/color through out the house this year with a winter wonderland theme. I've incorporated a lot of snowflakes, blue and silver and a little faux snow.

A few years ago we purchased this artificial tree.  The mistake we made was that in the large store the tree looked small, but when we brought it home it was much larger than we thought.  It takes up a lot of space in our small home, so placing it in the corner  take up less space.


I like having the tree in our family room as we sit in this room every day. We can view the tree easily  from the kitchen and dinning room.


The tree is decorated with silver and blue and a lot of glittery items.  I've added a few new ornaments this year that my mom gave me for my birthday.  Here are a few photos close up.


 Thrift store ornaments.


I used what I had for the tree skirt again this year. A table runner left over from our daughters weddings.  I love how the beads reflect the lights of the tree adding sparkle and a little bling.


Next to the television stand, I placed a poinsettia in my grandmothers old red wing crock.


On the top of the desk I placed three buckets I bought from the dollar bin at Target.  I added some jingle bells in the one bucket along with some faux snow.


I'm linking this post to ~
Thrifty Decor Chick - Holiday Home Linky Party - Trees


Friday, December 7, 2012

CHRISTMAS DECOR IN THE LIVING ROOM

If you're like me, once December hits I love to start decorating for Christmas.  I've been adding decor to each of the rooms in our home.  I thought I'd start sharing room by room  ~ Christmas Home Tour.

Today I'll start in the living room since this is where you come into the Parsonage (Our Home).
As you come in the front door you look directly at the wall with the sofa and coffee table.


My decorating is always done on a limited budget so many of the items are from garage sales, thrift stores or hand made myself.  This year I found some sparkly candles and snowflake candle holders along with a snowflake box at the thrift store.  I placed the candles on the table runner I made last year.  On the top of the table runner I added  ribbon and jingle bells.

The only things that aren't second hand items on the table, are the wreath that I bought new last year and the ribbon bought after Christmas last year ~ 75% off.


On the sofa I placed a piece of  faux fur and a pillow.


On the top of the corner cabinet I placed various metallic pieces, along with a few items that add texture and a bit of nature.


  The coat shelf also had a few items added.


I've already showed you my tree vignette that sits on top of my grandmothers cedar chest.


and my candle sticks that I made over sit on a side cabinet.


 Last but not least, the top of the cedar cabinet.


Come back and I'll show you more of my home.


Linking this post ~
Southern Hospitality Holiday Home Linky Party

Wednesday, November 7, 2012

THE OFFICE REVEAL

The day has finally come that you've all waited so patiently for: my office makeover reveal!  As you may recall, it started out as a closet makeover, but turned into a larger project when we had to treat a mold problem and do a lot of painting .  We also decided to add new baseboard and trim while doing this makeover.   I also did a lot of purging and organizing of this space including going through all drawers and files. The end result - a prettier more organized office that functions well for me.

 I present to you my new office closet.


I really had planned to go to IKEA to buy storage boxes and containers for this space, but we ended up not taking our daughter to the airport in October.  I couldn't justify a four hour round trip just to get them.  I've instead reused many items I already had in my home.

Wednesday, October 24, 2012

NEW BASEBOARD AND TRIM

We're moving on to adding the new trim and base board in my office.  Let's take a look at what we started with.  Old yellow looking wood dating back to when the house was built.


We decide to add white trim molding and baseboards.


 In the above photo, you can see the trim inside the closet. We decided to go with a plain trim on the inside of the closet without the rosettes since it's not visible when you walk into the room.

We added rosettes on the corners of the door trim. I like the charm it adds to the room but also adding these made it much easier for installation.  My husband could do straight cuts and didn't have to make mitered corners.


Here's a view of the new baseboard.  It's amazing how this new trim makes the room look so much newer and brighter.

Monday, October 8, 2012

OFFICE MAKEOVER

My office closet makeover has grown.  While working on this project, we've run into some snags - unexpected problems.  These problems made added work of re-taping the dry wall and many layers of new primer and paint.  This project has turned into more of a room makeover rather than a closet makeover.   My husband and I were discussing the room this weekend and came to a decision.  Since the room is getting more torn apart than planned and the wood work around the closet door and the base trim in the closet is being replaced, why not make the whole room look nice and get rid of the rest of the old trim. 

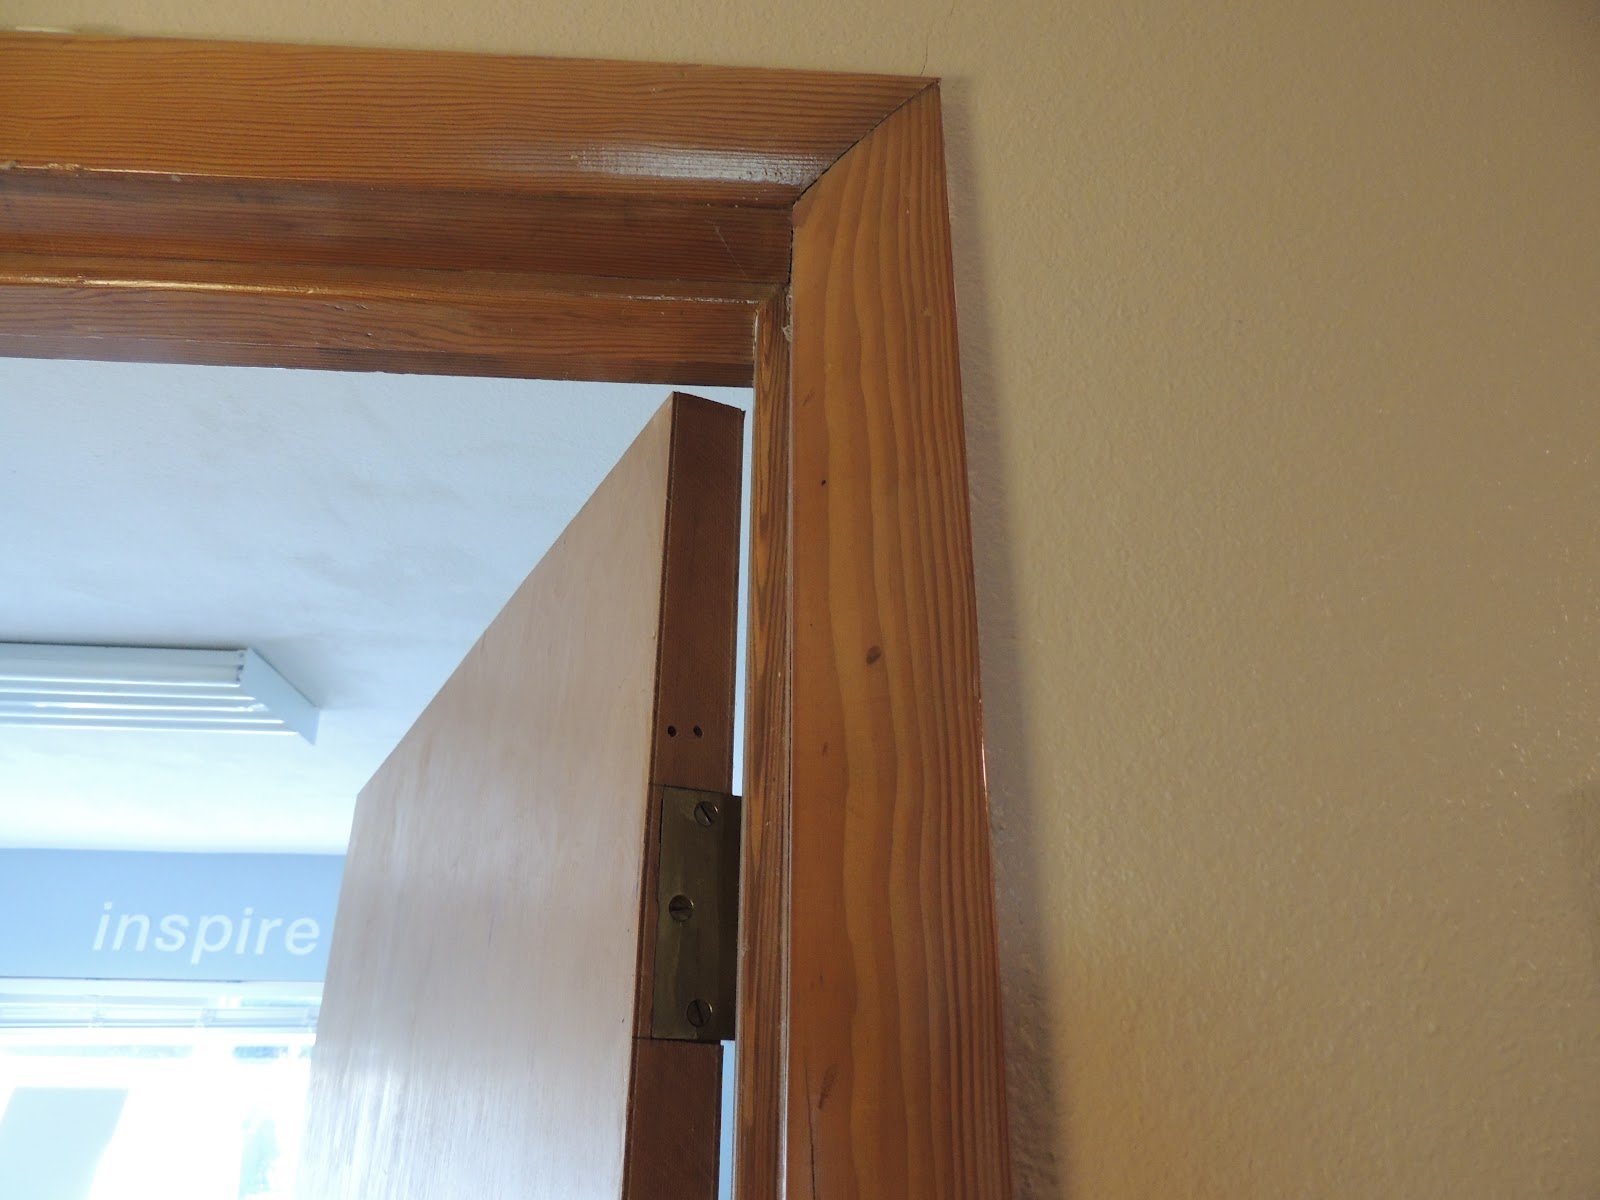
 Here's what the trim and baseboard look like in this room dating back to when this home was built we're guessing in the 30's or 40's.


Take note - they never even bothered to fill the nail holes.


 Old trim and plywood doors.


I'd say pretty ugly and dated trim.

This is what the room looks like as of this morning.


The trim and baseboard has all been removed; and we're off to Lowe's to buy new.


This afternoon I'm hoping to get all the trim painted (we are buying the trim that is already primed).  While I'm doing this, my husband will be working on installing the shelving system.    I'm also hoping to start the purging of office items that will be brought back into the room.  I'm getting anxious to have this room done and my house back in order.  You can look forward to more posts on the progress of the room.  We're getting closer to seeing the end results of a wonderful office makeover !
 

LinkWithin

Related Posts with Thumbnails