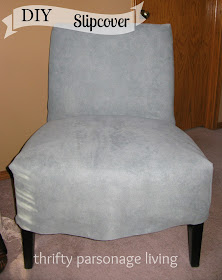
Since she has never made a slipcover for a chair, she asked for my help; and I agreed. What a fun way to spend the day with your sister! I'll take any opportunity I can to get together with both my sisters after living 1700 miles away from them for 16 years. Both of us have reupholstered a sofa; and I've done a few chairs as well. (You can see how I reupholstered my wing-back chair here.) We've also have both made slipcovers for pillows, but neither of us have made a slipcover for a chair. It was a learning experience for the both of us, so today I thought I'd share with you how we made the slip cover.
Here's the chair we started with.
Not bad at all, but she wanted to change the color of the chair to go with the colors of her newly painted dinning room. She didn't want to reupholster it because she wanted the option of going back to the original chair.
The first thing we did was find an old sheet to use for cutting out our pattern. We simply draped it over the chair and starting out by tucking and pinning the sheet. We then cut off all excess sheet - forming it into a pattern for our slip cover.
Once we had our pattern, we cut it out of the upholstery fabric. We started by sewing the front, back and bottom piece together. We then sewed a "dart" at the corners of the front legs. Next, we sewed the back side seams together followed by adding the top back. We wanted to be able to open the slipcover back, so we sewed a large pleat that overlapped. Buttons or Velcro will keep the slipcover closed. In the photo below you can see how we turned the entire slipcover inside out, pinning it tightly where the side seam will be sewn. Before sewing it, we cut off the excess fabric, making just enough fabric for the seam allowance.
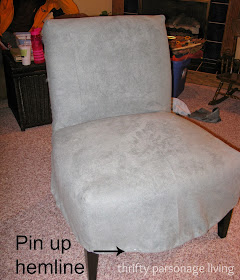
We then moved on to pinning the hem on the slipcover. My sister used iron-on hem tape to make a seamless hem.
Here's the finished project.
How do you think we did?
I also want to share some exciting news for me....
I received an email last night from HGTV and I've been featured at their site! You can go and check it out by clicking on the link below.
I also want to share some exciting news for me....
I received an email last night from HGTV and I've been featured at their site! You can go and check it out by clicking on the link below.


No comments:
Post a Comment